Microsoft Photo Story is free software for allows to create slides from images, with background musi..
3.0| License: Free |
| Released: Microsoft |
| Request: Windows XP/Vista/7 |
| Last updated: 11-03-2022 |
| OS: Window |
| Version: 3.0 |
| Total download: 825 |
| Capacity: 5 MB |
MENU
Microsoft Photo Story is free software for allows to create slides from images, with background music, subtitles, narration... set by the user individually on each image, to be able to create a story with illustrations and presentations vivid.
Surely users are familiar with Windows Movie Maker, a tool to create video slides from images, now you will be familiar with Photo Story for Windows, a tool that allows you to create stories from photos through a slide show.
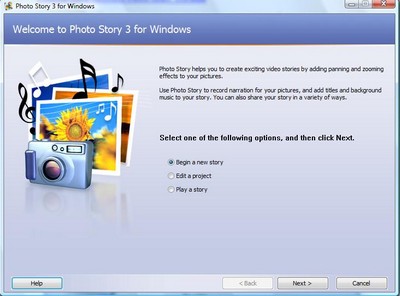
After downloading and installing, you access the path C :\Program Files\Photo Story 3 for Windows, activate the file PhotoStory3.exe to use. At the first interface of the program, select Begin a new story and then click Next to create a new slideshow.

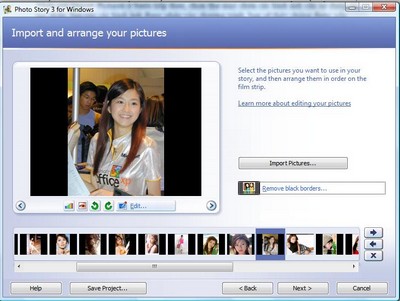
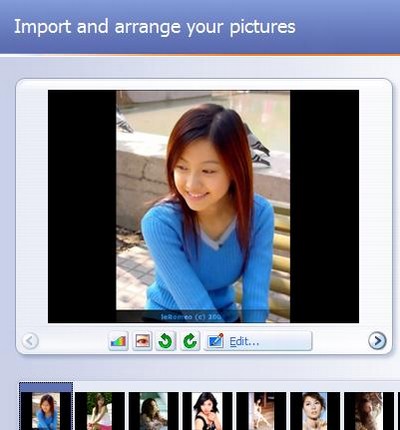
Press the Import Pictures button in the next step, select the folder containing the images you need to use to create the slide. Once the images are imported into the program, you will see them sorted into a list at the bottom.
Now it's time to start editing and adding effects to the images. To proceed, select an image from the list, then click the Edit button.
The Edit Pictures dialog box appears. In this dialog box, you can choose to rotate the image, crop the image to fit the slideshow frame (by checking the Crop option), or add effects to the image (select the Add Effect tab and select the effect). desired, check the box Apply the selected effect to all the pictures in your story to add effects to all selected images), besides the program also provides a feature to remove red eye for images…
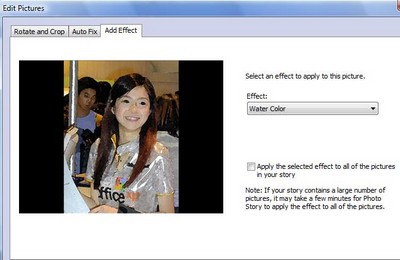
Press Save to save the effect for the image. You can edit and add effects to each image in turn.
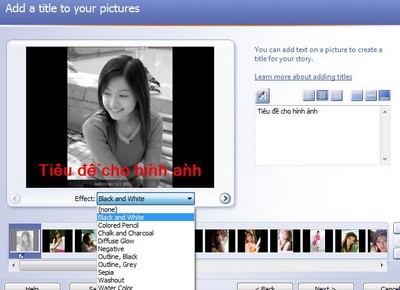
After you have finished editing and adding effects, go back to the main interface and press Next to go to the next step. At this step, you can add a title or put a caption for each image. Also, you'll see below that there's a Effect section to add effects to the image if needed (this is the same as the Add Effect feature above). p>
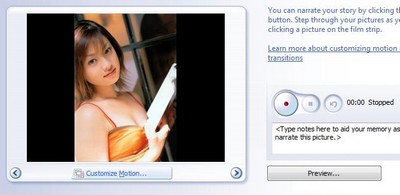
Perform on the images as needed. Then, press Next to continue. Now, the program will help you to record by using the microphone and pressing the Record Narration button. The highlight of the program is that it helps you to record audio on each image in turn, which will come in handy in case you are interpreting images or telling a story with illustrations. After you finish recording an illustration of an image, press Stop to pause and move on to the next image.
Once done, press Next to continue. In this step, the program will help you choose the background music for the slide. You can choose background music from your own music file (by pressing Select Music and selecting the corresponding music file) or choose music from the list the program provides (by clicking Create Music).
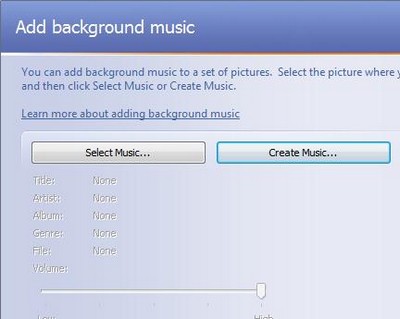
If the slide is created to share with family or friends, you can use your own music files, but if it is a slide for work or study, you should choose the tracks music provided by the program. When you click on the Create Music button, a new dialog box will appear offering a few options.
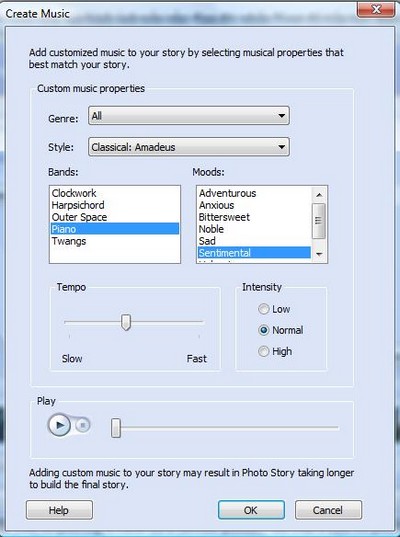
Here, you can choose music by genre, style, tone or even mood… this will be very helpful to illustrate your story with pictures.
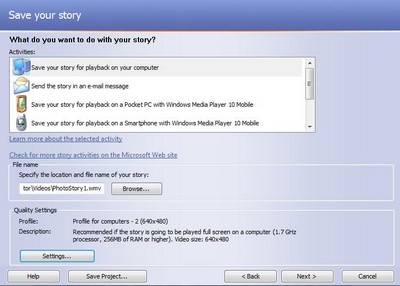
After finishing selecting music, press Next to go to the last step. At this step, you can choose how to save the newly created slides as video files, send them by email or save them on portable entertainment devices. You should choose the way to save on PC for the best picture and sound quality. Press the Browser button to choose a location to save the file, press Settings to change a few properties (if necessary), and finally press Next to file saving takes place.
So , you've completed the steps to create a slide that can be used to share images with others, or an animated story with illustrations.
.
Download FireAlpaca 2 free - Free Digital Painting software avail..
Photoshop is a professional image editing software from Adobe and..
Sweet Home 3D, Sweet Home 3D is an interior design software that ..
Cartoon Animator, Cartoon Animator is software that helps users c..
Glaze 3D is a highly rated 3D modeling and repair tool simulation..
5
4
3
2
1